A critical part of engineering is debugging a partially working system. Often, you will be handed code that someone else wrote but does not quite work. In this exam, you will show what you have learned in the class.
Below are five specifications. Five attempts at satisfying these specifications are in a zip file here: https://studentuml-my.sharepoint.com/:u:/g/personal/paul_robinette_uml_edu/EVgPkh8UUqtNqp8PxDYxY1oB-mEXuuRuLfo7xJx8WdTBjA?e=KVEBMg In the zip file, there is a folder for each deliverable that corresponds to a specification. Fix the code such that it actually meets the specification. Deliverable A should satisfy specification A, Deliverable B should satisfy specification B, etc.
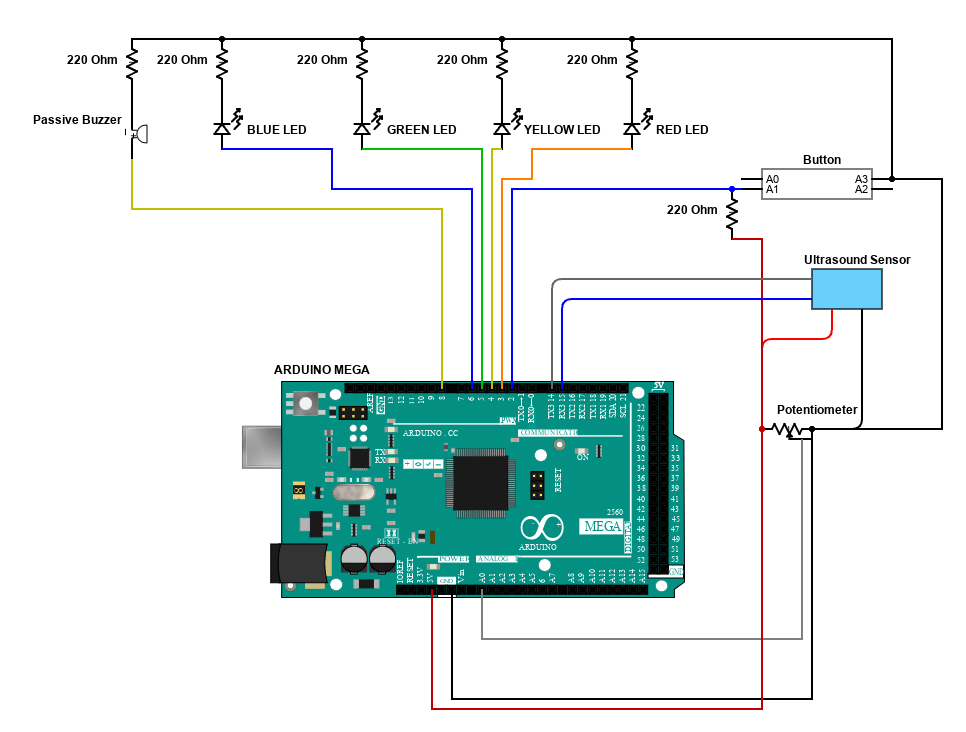
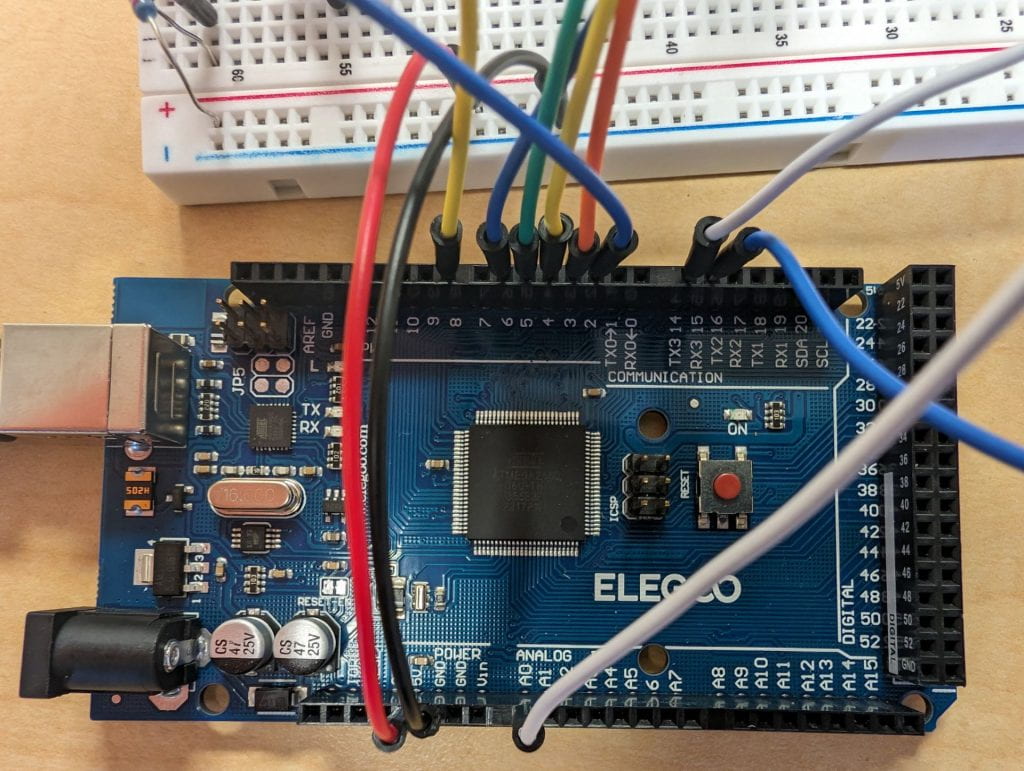
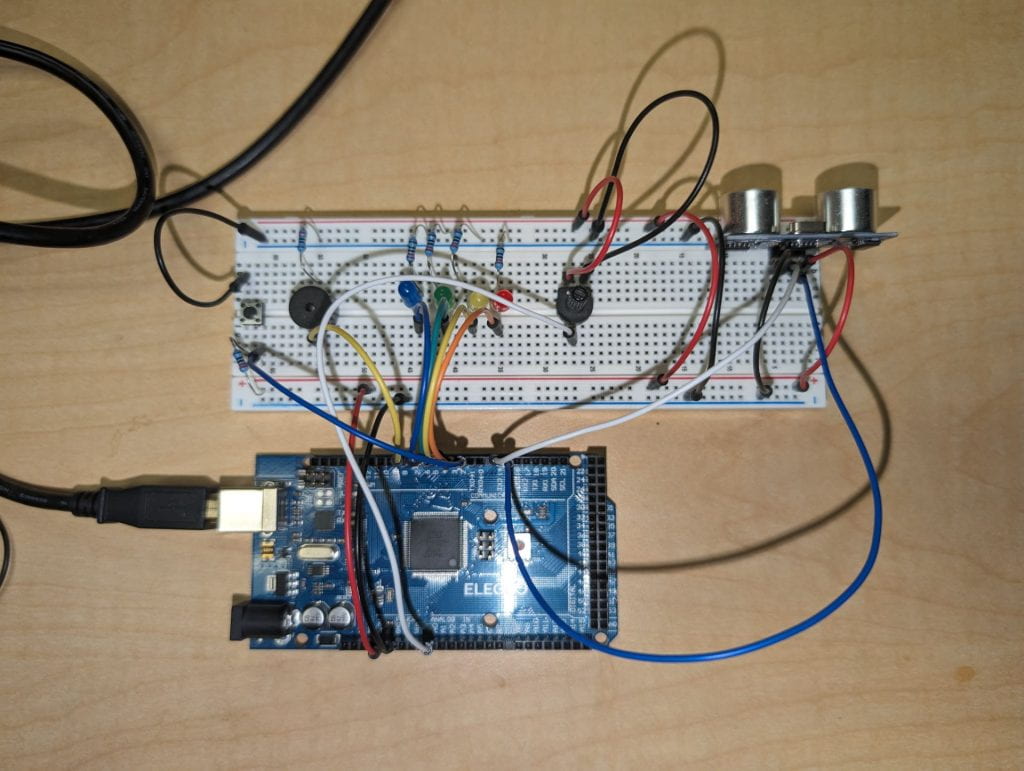
In this exam, treat the hardware as fixed. No changes may be made to the hardware design that follows. All specifications can be accomplished with the circuit in the diagram/pictures below. All power is 5V from the Arduino. The pinout from the Arduino is below. Note that each LED and the passive buzzer (speaker) have 220 Ohm resistors to ground. Note that the button has a hardware pullup resistor of 220 Ohm to +5V.
| Arduino Pin | Component (Pin) |
| 2 | Button |
| 3 | Red LED |
| 4 | Yellow LED |
| 5 | Green LED |
| 6 | Blue LED |
| 8 | Speaker + |
| 14 | Ultrasound (Echo) |
| 15 | Ultrasound (Trig) |
| A0 | Potentiometer |
Each Specification below is worth 20 points: 10 points for demoing the work and 10 points for submitting the correct code along with a document (PDF) that states what errors were found and how they were fixed. Each error/fix should only need 1-2 sentences to describe. You can submit one PDF for all deliverables.
The green LED should blink at 5Hz. That is, there should be five blinks per second. The LED should be on for the same amount of time as it is off in each blink.
The red LED and the speaker should be controlled by the potentiometer. The system should start by controlling the LED. When the button is pressed, the output should switch to the speaker. When the button is pressed again, it should go back to the LED, and so on. The button should operate using an interrupt. When the potentiometer is low, the LED should be dim or the speaker should output a low pitch. When high, the LED should be bright or the speaker should output a high pitch.
This is the same setup as specification B except that the distance detected by the ultrasonic sensor should change the LED brightness or speaker pitch. A long distance should cause low brightness or low pitch. As the distance shortens, the brightness should increase (maxxing at full) and the pitch should increase noticeably. Again, the button should swap between LED and speaker output, initializing to LED.
Initially, the red LED should be on. When the button is pressed, the yellow LED should turn on and the red LED should turn off. When the button is pressed again, only the green LED should be on, then blue, then back to red to start the cycle over again. Interrupts are not required, the button can be polled. Ensure that the LED stays on for at least 200ms after changing (e.g. do not change more than once in 200ms time).
Using the four LEDs, the color of LED that is on should be selected based on the range that the ultrasonic detector measures. Only one LED should be on at a time. When something is detected within about a meter of the ultrasound device the red LED should be on. Between one and two meters (approximately), the yellow LED should be on. If all is clear beyond two meters, the green LED should be on. If the ultrasonic detector returns a very small number, like 0, consider this an error state and turn on the blue LED.
Submit to Blackboard:
Demonstrate each deliverable to the instructor or TA.